
Quick answer
The transition hose is the short flexible duct between your dryer and the wall, and the most common unsafe part of the whole vent run. Foil and vinyl hoses sag, trap lint and can ignite; the safe replacement is rigid or UL-listed semi-rigid metal, kept short and straight. We replace transition hoses as part of dryer vent service across Raleigh, Cary and the Triangle, usually in under an hour.
The transition hose is the short duct that connects your dryer to the wall vent, and it is the part most likely to be crushed, kinked, or made of unsafe material. If yours is foil or vinyl/plastic, it should be replaced with rigid or semi-rigid metal. Prestige Protected replaces damaged transition lines as part of dryer vent service across the NC Triangle.
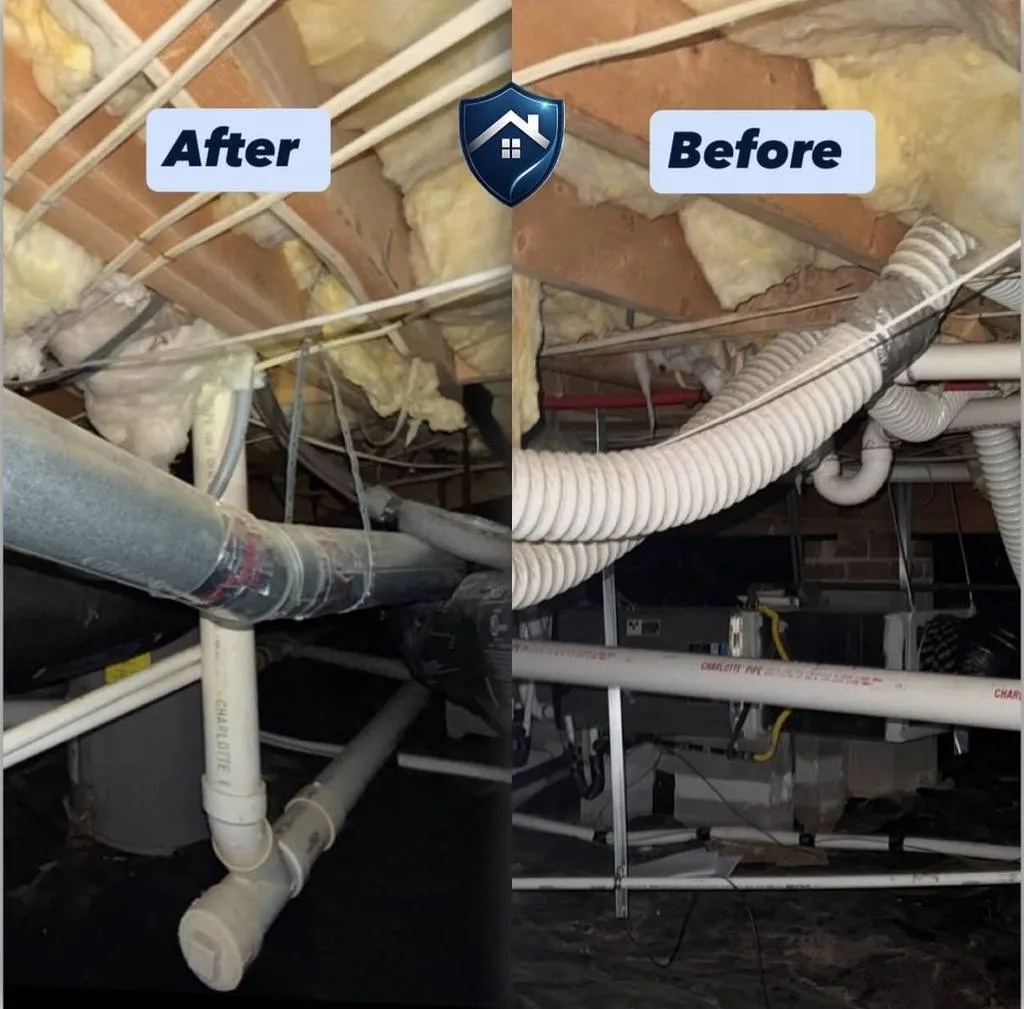
Foil and plastic hoses are a fire risk
Flexible foil and plastic transition hoses sag, trap lint, and can ignite. Manufacturers and fire-safety guidance call for rigid or UL-listed semi-rigid metal transition duct, kept as short and straight as possible. The International Residential Code (M1502) also limits total vent length and counts each bend against it.
- Replace foil/vinyl with rigid or semi-rigid metal
- Keep the transition short and free of crushing behind the dryer
- Pair a new transition with a clear, code-compliant vent run
Signs your transition hose needs replacing
- Visible crushing, kinks, tears, or scorching
- Foil or plastic material (not metal)
- Lint escaping behind the dryer
- Long drying times even after a cleaning
A damaged transition is often a sign the whole run needs attention. See dryer vent repair & replacement in Cary or Raleigh, or start with a dryer vent cleaning.
For the cleaning itself, see Cary or Raleigh.
Frequently asked questions
What type of dryer transition hose is safest?
Rigid or UL-listed semi-rigid metal duct. Avoid foil and plastic, which sag, trap lint, and can ignite.
Do you replace damaged dryer transition lines?
Yes, we replace damaged or unsafe transition lines with code-compliant metal duct as part of dryer vent service. Call (888) 404-8321.
Foil or damaged dryer hose?
Call (888) 404-8321 and we’ll replace it with safe, code-compliant duct.
Is a foil dryer hose actually illegal?
The accurate version is narrower than the internet version. The code requires a flexible transition duct to be listed and labeled to UL 2158A, limited to a single length of 8 feet or less, and not concealed within construction. Some foil products carry that listing and many older ones do not. Plastic and vinyl hoses do not meet it. Rather than argue about the word illegal, look for the listing marking on the duct itself, and if there is not one, replace it.
Can I replace the transition hose myself?
On an electric dryer, yes, if you are comfortable unplugging the machine, moving it and tightening two clamps. Buy a listed semi-rigid duct or a rigid periscope rather than the cheapest foil coil, keep it as short as it will go, and do not crush it when you push the machine back. On a gas dryer we would rather you did not, because the flexible gas connector is easy to strain and a leak is not a mistake you get to learn from.
How long should the replacement take?
About twenty to thirty minutes on its own, including cleaning the wall stub and testing a load. Most people have it done alongside a vent cleaning, which turns the whole visit into an hour or so and means the entire run gets dealt with at once rather than in two appointments.
What does a transition hose replacement cost?
It depends on the product the space needs and whether the wall stub and run need clearing at the same time, so we price it after looking rather than publishing a number we would have to walk back. What we will tell you before starting is the full figure in writing, and it is one of the least expensive things we do.
My hose disappears into the wall. Is that a problem?
Yes, on two counts. The code does not permit a transition duct to be concealed within construction, and a flexible hose inside a wall cavity is a section nobody can inspect, clean or see fail. What belongs inside the wall is rigid smooth-wall duct. Sorting that out is a repair on the concealed run rather than a hose swap, and we would look at it with a camera first.
Do I need a new hose if mine is metal and looks fine?
Probably not, and we will say so. Check three things: that it is a single length under 8 feet, that it is not crushed or kinked behind the machine, and that both clamps are tight with no lint escaping. If all three pass, leave it alone and put the money toward cleaning the concealed run instead.
How to check yours in two minutes
- Pull the dryer out a foot or two and look at the duct connecting it to the wall.
- Shiny thin foil that crinkles like a slinky, or white/clear plastic? That is the material fire-safety guidance says to replace, plastic especially.
- Crushed flat behind the dryer? Even a metal hose loses most of its airflow when the dryer is pushed back against it.
- Longer than about 8 feet, or looping in coils? Excess hose traps lint in every sag. The run should be as short and straight as the space allows.
- Squeeze it gently. If you feel a packed layer inside, the hose is lined with lint, the fuel that makes these fires fast.
How the replacement is done
The swap itself is quick; doing it properly is what matters. We disconnect and bag the old hose (the lint inside makes a mess otherwise), check the wall connection and the first stretch of the in-wall duct for buildup, a lint-packed transition hose almost always means lint further down the line, then fit a rigid or semi-rigid metal transition duct cut to the actual distance, secured with clamps and foil tape rather than screws, which snag lint. We finish by verifying airflow at the exterior hood, because a beautiful new hose feeding a clogged line fixes nothing. If the line is loaded, a full vent cleaning is the companion job, quoted in writing before we do anything.
The stakes are real but the fix is cheap: the U.S. Fire Administration reports roughly 2,900 home dryer fires a year, and the transition hose is where many of them start, it is the closest fuel to the dryer’s heat. This is one of the cheapest safety fixes in home ownership. See also dryer vent repair in Raleigh, rerouting a bad line, and our main Raleigh page.
It is the cheapest part of the system and the one most likely to be wrong. The short flexible piece between the back of your dryer and the wall has its own rules, and the white plastic and thin foil versions sold for decades do not meet them.
What the code actually requires
This is one of the few areas where the requirements are precise enough to check yourself. Under the exhaust systems chapter of the International Residential Code, a flexible transition duct used to connect a dryer to the exhaust duct system must be listed and labeled in accordance with UL 2158A, must be limited to a single length not exceeding 8 feet, and must not be concealed within construction.
Read that last clause again, because it is the one people trip over. A transition hose is not allowed to disappear inside a wall, a cabinet or a built-in laundry surround. It exists to be visible and replaceable. If yours vanishes behind drywall, what you have is not a compliant transition duct, and it is also a piece of the system nobody will ever inspect.
The 8 foot limit is separate from the 35 foot budget for the rigid exhaust duct behind the wall, so a long transition hose does not simply eat into the other number, it is its own violation. And “single length” means one piece. Two hoses taped together to reach are not a compliant assembly, however tidy the tape looks.
Manufacturer instructions can be stricter than the code, and where they are, they win. If you still have the dryer manual, the installation section will name the duct type it requires.
Foil, plastic, semi-rigid, rigid: what you are actually looking at
- White or clear plastic (vinyl) flexible duct. The one to get rid of today. It is combustible, it holds a deep ribbed profile that catches lint at every ridge, and it collapses and kinks when a dryer is pushed back into place.
- Thin foil flexible duct. Better than plastic and still poor. The wire-supported foil crushes easily, tears at the crimp, and its ribs collect lint the same way. This is the type most often found behind older machines in Triangle homes.
- Semi-rigid aluminum. A reasonable choice where a listed and labeled product is used, kept to a single short length, and not crushed against the wall. It holds its shape far better than foil and is what we usually fit when there is not room for rigid pipe.
- Rigid metal pipe. Smooth-wall, the best airflow, and the standard for the concealed run behind the wall. Best where the dryer sits far enough out to allow the elbows, and impossible in a tight closet, which is why the transition hose exists at all.
- Periscope or telescoping rigid boxes. Useful in shallow closets where the machine sits close to the wall. Smooth inside, low profile, and they eliminate the crushed loop of hose behind the dryer entirely.
The two-minute check behind your dryer
- Unplug the dryer, or turn off the gas at the appliance shut-off if it is a gas machine. Do not skip this. If you are not comfortable with the gas valve, leave the inspection to us.
- Ease the machine forward a foot. Slowly, so the hose is not torn while you are looking for tears in it.
- Identify the material. Plastic or thin foil means replace. Semi-rigid or rigid means keep looking.
- Look at the shape. A hose crushed flat behind the machine, kinked into an S, or looped twice to take up slack is restricting airflow whatever it is made of.
- Check the two connections. The clamp at the dryer outlet and the clamp at the wall. Both should be tight, with no gap venting lint into the room. Duct tape is not a connection, and sheet metal screws should not protrude into the airstream.
- Measure it. Anything over 8 feet, or made of two pieces, is out. Then look for lint on the floor behind the machine, which is the tell-tale of a leak you have not spotted yet.
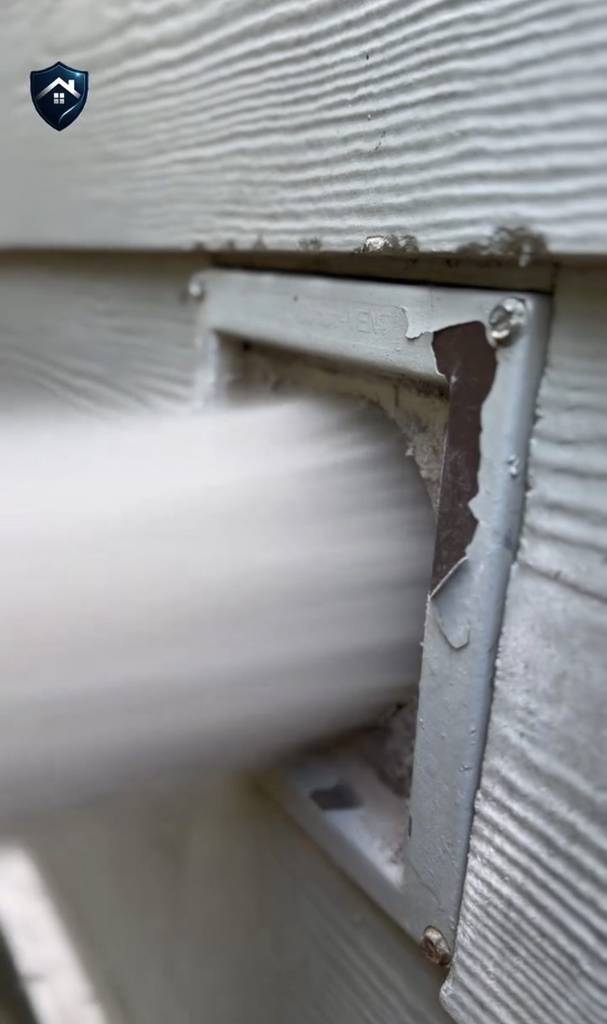
How we do the replacement
- Isolate the appliance. Power off, or gas off at the appliance valve, and the machine pulled out far enough to work behind properly.
- Clean before connecting. There is no point fitting a new hose onto a wall stub packed with lint, so the stub and the first accessible length of the rigid run get cleared first.
- Fit the right product for the space. A listed semi-rigid duct kept to one short length, or a rigid periscope where the clearance is tight. Clamped at both ends, no tape as a structural element, no screws into the airstream.
- Reposition the dryer without crushing the new duct. This is the step that gets skipped by whoever installed the last one, and it is why the hose was flattened in the first place.
- Test and photograph. Reconnect, run a load, confirm strong airflow at the exterior cap, and hand you before and after photos. On a gas machine we confirm the connection is sound before we leave.
Why a four-foot piece of duct matters this much
Because it is where the lint is. The transition hose sits immediately downstream of the machine, so it sees the highest lint concentration in the entire run, and its ribbed profile gives that lint somewhere to catch. Combustible material, in the place with the most lint, next to the heat source.
The U.S. Fire Administration reports roughly 2,900 clothes dryer fires in residential buildings each year, with an annual average of 5 deaths, 100 injuries and $35 million in property loss, and identifies the cause without hedging: “Failure to clean (31%) was the leading factor contributing to the ignition of clothes dryer fires in homes from 2018-2020.” Replacing a plastic hose is a twenty minute job against that background, which is a rare piece of home maintenance where the arithmetic is not really arguable.
If the rest of your run also needs attention, the transition hose is usually done at the same visit as a full vent cleaning. Where the concealed run itself is crushed, disconnected or simply too long, that is a repair or a reroute rather than a hose swap, and we will tell you which one you are looking at.
Last updated by the Prestige Protected service team.
More transition hose questions
Are foil dryer hoses actually against code?
Building code (IRC M1502) requires transition ducts to be listed and labeled for the purpose, and dryer manufacturers overwhelmingly specify rigid or UL-listed semi-rigid metal. Thin foil hoses sold as “dryer duct” often do not meet that bar, and vinyl or plastic hose never does. Whatever the label says, foil and plastic are the materials fire investigators keep finding at the origin.
How long does the replacement take?
Under an hour for the hose itself. If the vent line behind it needs cleaning, it usually does when the hose was foil or plastic, the combined visit runs about two hours.
What does it cost?
We quote it in writing per job, because the honest price depends on the hose length, the wall connection’s condition, and whether the line behind it needs cleaning. No bait pricing: the quote you approve is what you pay.